Saturday, April 23, 2011

MQX - East

WOW ... That's it ... Just WOW!
This show exhibits some of the finest quilter's I've ever seen.
I found myself with camera in hand snapping photo's
not of whole quilts - but sections of quilts ... or rather sections of quilting on the quilts!
Did I have a favorite ... Yes! .... all of them!!!


Janet Stone' "Red Letter Daze"  Won Best of Show - it was outstanding.
The wall hanging quilt was made of smaller quilts that were incorporated
into the larger and then quilted and embellished.
I think I stood in front of that quilt for 20 minutes just examining
every little quilt ... and the quilting .... she did it one a Janome 6600!
That's it ... I'm trading in my machine!!!


this was just one of the small quilts that made up the larger whole quilt!


OK - look at all of these ribbons!!!

"Whitetail Morning" was created by Dustin J. Farrell
1st Place Art/Pictorial
Viewers Choice
Best Use of Thread
Best Machine Quilting - Sit Down

This deer looks so real!

Here are a few more photo's that I snap during the day ...


this was just so sweet!


so this quilt is purple and all the color you see is .... threadwork!!!


I absolutely LOVED this quilt!


When I first looked at this quilt I wasn't too taken with it ...
but then I stepped in for a closer look ...

Just look at this sun!! Wow!

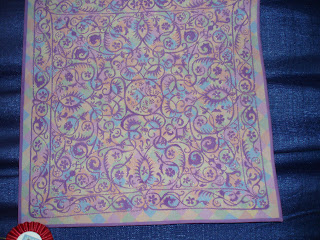
 I was lucky enough to have my "Batik Stars in the Garden" accepted into the show!
That was such a huge accomplishment for me.
I have to give my Quilty Gal Pal Diana Annis all the credit
for her incredible quilting she did on my applique baby!
Thank You Diana!

Tuesday, April 12, 2011

The Process

SO I'm surfing my blog list and I'm finding this button: 

 on quite a few of my favorite blogs ... and after skipping around a bit I landed at this blog - where Rossi explains the whole process (no pun intended!)

I know I have a bad habit of just showing the finished project and not all the horror that can go on behind the scenes (if you know what I mean). That's why I decided to that the "pledge" and get better at blogging the whole process and not just the "Ta-Da moment".

Starting now I pledge to document the good the bad and the not so pretty of the projects I'm working on -
maybe it will help someone, inspire someone or just plain motivate someone to try something maybe they wouldn't have ever tried before (quilty-wise that is!)

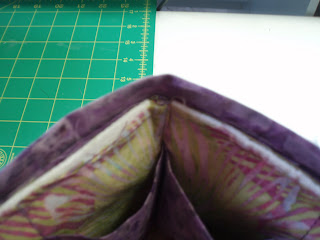
I guess I'll start now with a project I'm working on for a class I'm teaching next Sat. It is a Terry Atkinson Design "Pockets to Go" and I'm really liking it .... except I cut my side panels too short so I had to readjust the pattern to make everything fit!

Here are a few photos and tips of the process.....

Adding the top binding - pinned in place


taking my time sewing it on - I'm using my machine's free arm to get around


Once sewn in place, I pulled it up and over - just like binding a quilt


and pinned it in place ... BUT ... I found it too difficult to hand stitch down this way so....
I turned the whole thing inside out and whip stitched it - Much easier!


Then I'm onto the larger size - I'm thinking this would be great to put all my pocketbook stuff in
making transferring from bag to bag much easier


Had to add BLING! sorry for the fuzzy pic

creating the pocket in stages

pressing it open and viola pocket!

applying the binding around all the exposed edges

once you turn the binding to whip stitch the back the front looks great

almost done - just need Pel-tex sides and top binding!


Okay so that's my first attempt at trying to document part of the process! Hope it was helpful?!
Happy Quilting, JanetAnn :)